Welcome to Advanced Floating Content plugin documentation. Let's get you started with version 4.0.
Plugin Overview
Advanced Floating Content gives you the power to create eye-catching banners, announcements, and promotions that appear anywhere on your WordPress site. With its intuitive, redesigned interface, you can build professional floating content—like sticky headers, sidebars, or popups—in just minutes, without any coding.
It’s the simplest way to boost engagement, highlight offers, and guide your visitors, perfect for any website that wants to make a bigger impact.
Smart Positioning Fixed, sticky, or absolute placement anywhere on screen
Advanced Targeting Show content to specific pages, users, devices & locations
Smart Scheduling Date/time scheduling with countdown timers for urgency
Visual Design Complete styling control with custom CSS support
Device Optimization Fully responsive with separate mobile/desktop controls
Engaging Effects Smooth animations & motion effects for better UX
Developers delivering professional client projects
What's New in Version 4.0
Welcome to our biggest update yet! Advanced Floating Content v4.0 delivers a completely redesigned admin experience that makes creating and managing floating content faster, clearer, and more enjoyable than ever before.
v4.0A Major UI/UX Upgrade
Completely Redesigned Interface
A modern, clean admin UI built for clarity and speed, with smart sticky navigation, improved spacing, and better visual hierarchy.
Faster Workflow, Less Guesswork
One-click navigation between sections, smart auto-open metaboxes, and cleaner form layouts that save you time.
Built for Real WordPress Users
Feels native with seamless Gutenberg/Classic Editor integration, touch-friendly UI, and WCAG-compliant accessibility.
Smarter License & Settings
Improved license validation, reorganized settings panel, and enhanced dashboard statistics for better management.
Developer & Agency Friendly
Cleaner refactored codebase, improved hooks/filters, and organized structure for scalability and client handoff.
Fully Responsive Admin
Manage your floating content from any device with a touch-friendly, mobile-optimized interface.
For Existing Users: Your existing floating content continues to work seamlessly. The new interface will feel familiar yet significantly improved, with all your previous settings preserved.
Installation
Follow these simple steps to install the plugin on your WordPress site:
1
Download & Install Plugin
Method A: WordPress Dashboard (Easiest)
Go to your WordPress Dashboard > Plugins > Add New
Click "Upload Plugin" at the top
Click "Choose File" and select the advanced_floating_content.zip file
Click "Install Now"
After installation, click "Activate Plugin"
Method B: FTP / File Manager (Advanced)
Unzip the advanced_floating_content.zip file on your computer
Upload the extracted advanced_floating_content folder to your server
Place it in the /wp-content/plugins/ directory via FTP or your hosting file manager
Recommended: Use Method A (WordPress Dashboard) if you have access to your WordPress admin. It's simpler and handles everything automatically.
2
Activate the Plugin
Go to your WordPress admin dashboard, navigate to Plugins, find Advanced Floating Content in the list, and click the "Activate" button.
3
Access the Plugin
Once activated, Advanced Floating Content will appear in the left sidebar menu of your WordPress dashboard, ready for use.
4
You're Ready to Create!
Start creating your first floating content by clicking "Add New" under the Advanced Floating Content menu in your WordPress dashboard.
System Requirements: For optimal performance and compatibility, ensure you're running WordPress 5.0 or higher and PHP 7.2 or later.
License Validation
Before using the plugin, you must validate your purchase code to unlock all features and receive updates.
Steps to Validate Your License:
Go to your WordPress Dashboard
Find and click on Advanced Floating Content in the left sidebar menu
Click on the "Settings" panel or tab
Enter your Email Address, CodeCanyon Username, and Purchase Code
Click the "Validate License" button
License Validation Screen Example
Important fields to fill:
Email: The email used for purchase
CodeCanyon Username: Your account username
Purchase Code: Found in your CodeCanyon downloads
Validate License: Click this button after filling all fields
Where to find your Purchase Code? Log into your CodeCanyon account, go to "Downloads" tab, find Advanced Floating Content, and click "License Certificate" to view your purchase code.
Important: The plugin requires a valid license to function properly. Without validation, premium features will remain locked, and you won't receive important updates or support.
Need help? If you encounter any issues during license validation, ensure you're entering the exact details from your CodeCanyon account. The system is case-sensitive.
Content Management
Learn how to create, manage, and preview your floating content in just minutes.
Create New Floating Content
Creating floating content takes just minutes! Follow these simple steps to get started:
1
Access the Content Creator
In your WordPress Dashboard, go to Advanced Floating Content → Add New.
Quick Tip: You can also click the "Add New" button from the main floating content list page.
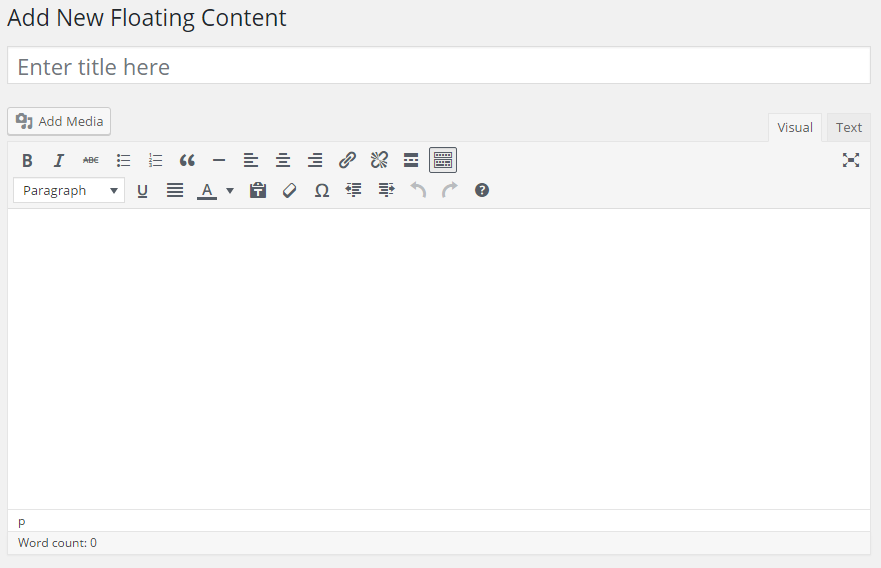
2
Add Your Title & Content
Enter a Title (for your reference only, won't appear on the front-end) and add your content using either:
Gutenberg Editor
Use the modern block editor to add text, images, buttons, or any content blocks.
Classic Editor
Use the familiar TinyMCE editor with formatting toolbar.
3
Save & Configure
Click "Publish" (Gutenberg) or "Publish" → "Publish" (Classic) to save your content.
Note: After saving, use the settings panels on the right sidebar to configure positioning, styling, and display rules.
What You Can Create
🎉 Special Launch Offer!
Get 40% OFF on all annual plans this week only!
Example of a promotional floating banner you can create in minutes.
Live Preview
Instantly see how your floating content will appear on your website before publishing.
How to Use Live Preview
1
Create & Save Content
Build your floating content and click "Publish" or "Update" to save it.
2
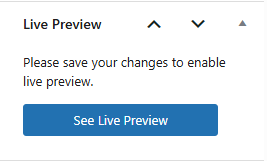
Click Live Preview Button
Find the "Live Preview" box in the right sidebar and click "See Live Preview".
Live Preview Button Location
Note: You must save your content first before the Live Preview button becomes active. The preview updates automatically each time you save changes.
Advanced Settings
Fine-tune every aspect of your floating content with these powerful configuration options.
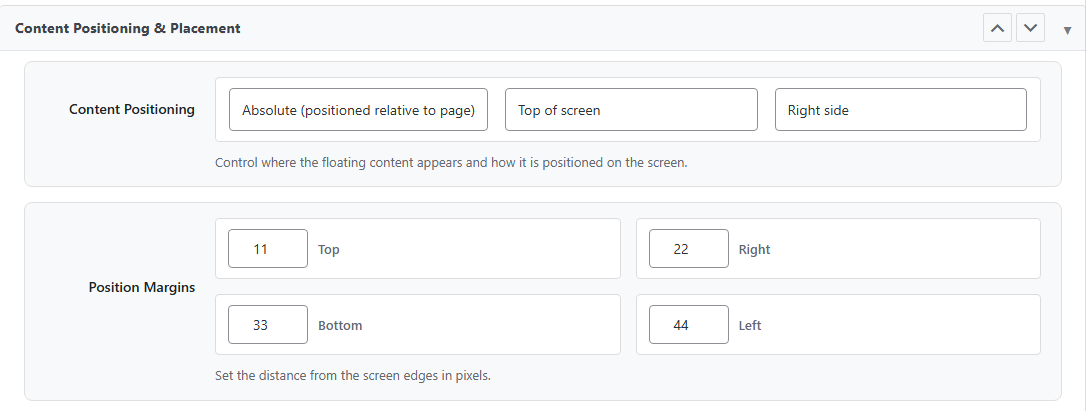
Content Positioning & Placement
Control exactly where and how your floating content appears on the screen with precision positioning options.
Setting
Options
Description
Default
Position Type
Fixed • Absolute • Scroll
Fixed: Stays in the same place when scrolling (follows the screen)
Absolute: Positioned relative to the page content
Scroll: Moves with the page content as you scroll
Fixed
Vertical Position
Top • Bottom
Whether the content appears at the top or bottom of the screen/viewport
Top
Horizontal Position
Left • Right
Whether the content appears on the left or right side of the screen/viewport
Right
Position Examples
Fixed Top-Right
Content
Stays in corner while scrolling
Absolute Bottom-Left
Content
Positioned relative to page
Position Margins
Fine-tune the exact distance between your floating content and the screen edges. Set margins in pixels (0-500px).
Margin
Input Range
Description
Default
Top Margin
0 - 500px
Distance from the top edge of the screen/viewport
0px
Right Margin
0 - 500px
Distance from the right edge of the screen/viewport
0px
Bottom Margin
0 - 500px
Distance from the bottom edge of the screen/viewport
0px
Left Margin
0 - 500px
Distance from the left edge of the screen/viewport
0px
How to Use Margins
Enter a number (0-500) in each margin field
The value represents pixels from the edge
Use the same value on opposite sides for centered positioning
Leave at 0 to place content directly at the screen edge
Example: For a banner that appears 20px from the top and 50px from the right side, set Top = 20 and Right = 50.
Positioning Settings Interface
Key interface elements:
Position Type dropdown - Fixed/Absolute/Scroll
Vertical/Horizontal position - Top/Bottom & Left/Right
Margin number inputs - Set distance from edges (0-500px)
Pro Tip: Use Fixed positioning for elements that should always be visible (like announcement bars). Use Absolute positioning for content that's part of the page layout.
Design & Appearance
Customize the visual style of your floating content with complete control over colors, spacing, borders, and typography.
Close Button Options
Standard button, custom text link, or no close button at all
Layout Controls
Width, padding, borders, and background customization
Color Settings
Text, background, border, and button colors
Close Button Settings
Setting
Options
Description
Default
Close Button Type
Standard • Custom Text Link • None
Standard Close Button: Displays a standard close (X) button
Custom Text Link: Add your own close link inside the content
No Close Button: Content cannot be closed by users
Standard Close Button
Button Position
Top-Left • Top-Right • Bottom-Left • Bottom-Right
Where the close button appears within the floating content
Top-Right
Button Background Color
Color Picker
Background color of the close button
#951305
Using Custom Text Link Close Button
When you select "Custom Text Link" as the close button type, add this HTML code anywhere in your content:
Color Pickers - Text, background, and button colors
Typography - Font size and color
Design Tips:
Use high contrast between text and background for readability
Set appropriate padding (20-30px) for comfortable content spacing
Consider rounded corners (5-10px) for a modern, friendly appearance
Use consistent colors that match your website's branding
Advanced Display Rules & Targeting
Take complete control over where, when, and to whom your floating content appears with these powerful targeting options. Fine-tune visibility based on user status, page types, devices, locations, and more.
Targeting rules are processed in a logical order. When a visitor arrives, the plugin checks each targeting rule to determine if the content should be displayed. You can combine multiple targeting types for precise control.
Visitor arrives
↓
Check security rules
↓
Check page targeting
↓
Check device/location
↓
Check scroll/impressions
↓
Show/Hide content
Security & Access Control
Control who can see your floating content based on user authentication and IP addresses. Perfect for internal announcements, member-only content, or blocking specific visitors.
User Authentication
Show content only to logged-in users or all visitors
IP Blocking
Prevent specific IP addresses from seeing content
Centralized Management
Manage blocked IPs from a central admin page
Visitor Access Rules
Setting
Options
Description
Default
Visitor Access
• All Visitors
• Logged-In Users Only
Control whether content is visible to everyone or only authenticated users
All Visitors
Use Cases:
Member-only announcements - Show special offers only to logged-in members
Internal communications - Display staff notices only to authenticated users
Public promotions - Show to all visitors for maximum reach
IP Access Control
Setting
Options
Description
Default
IP Filtering
• Disable IP Filtering
• Enable IP Filtering
Enable or disable IP-based access control for this content
Disable IP Filtering
IP Management: Blocked IP addresses are managed from the Blacklist IPs page under the plugin menu. This centralized system allows you to maintain a single list of blocked IPs that can be applied to multiple floating content items.
Important: IP filtering affects all visitors from blocked IP addresses. Use this carefully to avoid blocking legitimate users.
How Security Rules Work Together
User visits your site - The plugin checks if they're logged in
Check authentication rule - If set to "Logged-In Users Only" and visitor is not logged in, content is hidden
Check IP filtering - If IP filtering is enabled, check if visitor's IP is in the blacklist
Block if blacklisted - If IP is blacklisted, content is hidden regardless of other settings
Show content - If all checks pass, content is displayed
Core Page Targeting
Control where your floating content appears on essential WordPress pages like homepage, search results, and archive pages. Perfect for site-wide announcements or specific page promotions.
Homepage Control
Show or hide content on your main homepage
Search Results
Target visitors actively searching your site
Archive Pages
Control visibility on category, tag, and date archives
Core Page Settings
Page Type
Setting
Options
Description
Default
Homepage
Display on Homepage
Enable • Disable
Control whether content appears on your website's main homepage
Enable
Search Results
Display on Search Results
Enable • Disable
Show or hide content on WordPress search results pages
Enable
Archive Pages
Display on Archive Pages
Enable • Disable
Control visibility on category, tag, author, and date archive pages
Enable
Homepage Targeting Examples
Enable on Homepage
Use when: You want site-wide announcements or promotions
Result: Content appears on your main homepage
Disable on Homepage
Use when: Content is only relevant to inner pages
Result: Content hidden on homepage but shows elsewhere
What are Archive Pages?
Archive pages in WordPress include:
Category archives - Lists all posts in a specific category
Tag archives - Lists all posts with a specific tag
Author archives - Shows all posts by a specific author
Date archives - Lists posts from a specific month/year
Custom taxonomy archives - For custom post type taxonomies
Post Targeting
Precisely control which blog posts display your floating content. Include or exclude specific posts, target by selection, or use post IDs for exact control.
Include & Exclude
Both include specific posts and exclude others
Visual Selection
Choose posts from a visual dropdown interface
ID-Based Targeting
Target exact posts using their WordPress IDs
Post Display Rules
Rule Type
Options
Description
When to Use
All Posts
Show on all blog posts
Content appears on every post on your site
Site-wide announcements, general promotions
Selected Posts
Choose from dropdown list
Manually select specific posts from a visual interface
Exclude specific posts selected from visual interface
Hide from specific articles, sensitive content
Specific Post IDs
Enter comma-separated IDs
Exclude exact posts using their WordPress IDs
Advanced exclusions, programmatic control
How Include & Exclude Work Together
1
Include Rules First
The plugin first checks your "Display Rules" to see if the current post should show content.
→
2
Then Check Exclude Rules
If the post passes include rules, the plugin checks exclude rules.
→
3
Final Decision
Content shows only if post passes include rules AND is not in exclude rules.
Example: If you set "All Posts" for display and exclude post ID 123, content will show on all posts except post 123.
Finding Post IDs:
Go to Posts → All Posts in WordPress admin
Hover over any post title and check the URL in your browser's status bar
The ID appears in the link: post.php?post=123&action=edit
You can also use "Quick Edit" to see the post ID
Page Targeting
Control exactly which WordPress pages display your floating content. Use the same powerful include/exclude system as post targeting for complete control over page visibility.
Page-Specific Control
Target individual pages or groups of pages
Visual Page Selector
Choose pages from a dropdown of all your pages
Include/Exclude System
Same flexible system as post targeting
Page Display Rules
Rule Type
Options
Description
When to Use
All Pages
Show on all WordPress pages
Content appears on every page (not posts) on your site
Site-wide page announcements, navigation elements
Selected Pages
Choose from dropdown list
Manually select specific pages from visual interface
Targeting specific landing pages, service pages
Specific Page IDs
Enter comma-separated IDs
Target exact pages using their WordPress page IDs
Advanced targeting, bulk page operations
Page Exclude Rules
Exclude Type
Options
Description
When to Use
Selected Pages
Choose from dropdown list
Exclude specific pages selected from visual interface
Hide from contact pages, sensitive pages
Specific Page IDs
Enter comma-separated IDs
Exclude exact pages using their WordPress IDs
Advanced exclusions, programmatic control
Pages vs Posts: What's the Difference?
📄 Pages
Static content (About, Contact, Services)
Hierarchical (can have parent/child pages)
No categories/tags
Not in RSS feeds
Example: About Us, Contact Page
📝 Posts
Dynamic content (blog articles, news)
Chronological (organized by date)
Has categories/tags
Appear in RSS feeds
Example: Blog articles, news updates
Tip: Use Page Targeting for static content like landing pages, and Post Targeting for blog articles and news content.
Common Page Targeting Scenarios
Goal
Display Rule
Exclude Rule
Result
Site-wide banner
All Pages
None
Shows on every page (except posts)
Service page promotion
Selected Pages (service pages)
None
Shows only on selected service pages
All except checkout
All Pages
Specific Page IDs (checkout page)
Shows on all pages except checkout
Landing page only
Specific Page IDs (landing page)
None
Shows only on the exact landing page
Category Targeting
Target entire groups of posts based on their categories. Perfect for topic-specific promotions, category-based announcements, or organizing content by subject area.
Category Groups
Target all posts within specific categories
Bulk Control
Manage visibility for dozens of posts at once
Hierarchical Support
Works with parent/child category structures
Category Display Rules
Rule Type
Options
Description
When to Use
All Categories
Show on all categories
Content appears on posts from any category
General announcements, site-wide content
Selected Categories
Choose from dropdown list
Manually select specific categories from visual interface
Exclude specific categories selected from visual interface
Hide from sensitive topics, irrelevant categories
Specific Category IDs
Enter comma-separated IDs
Exclude exact categories using their WordPress IDs
Advanced exclusions, programmatic control
How Category Targeting Works
📂 Technology
📱 Mobile
💻 Computers
🎮 Gaming
→
📄 iPhone Review (Mobile)
📄 Laptop Guide (Computers)
📄 Game Review (Gaming)
When you target the "Technology" category: Content will appear on all posts in Technology AND all its child categories (Mobile, Computers, Gaming).
Finding Category IDs:
Go to Posts → Categories in WordPress admin
Hover over any category and check the URL in your browser's status bar
The ID appears in the link: term.php?taxonomy=category&tag_ID=123
You can also use "Quick Edit" to see the category ID
Common Category Targeting Examples
Business Type
Category Strategy
Benefit
E-commerce Blog
Target "Product Reviews" category
Show related product offers on review posts
News Site
Exclude "Opinion" category
Keep announcements off opinion/editorial content
Recipe Blog
Target "Dessert Recipes"
Show baking supply promotions on relevant recipes
Tech Blog
Target "Software" but exclude "Hardware"
Show software deals only on software-related posts
Custom Post Type Targeting
Extend your targeting capabilities to custom post types created by themes or plugins. Perfect for portfolios, testimonials, products, events, or any custom content types.
Plugin & Theme Support
Works with any custom post type registered in WordPress
Two-Level Control
Control by post type AND by specific items
Dynamic Detection
Automatically detects all custom post types on your site
Custom Post Type Rules
Rule Type
Options
Description
When to Use
All Custom Post Types
Show on all CPTs
Content appears on all custom post types (not regular posts/pages)
Site-wide announcements for custom content
Selected Custom Post Types
Choose from dropdown list
Manually select specific post types from visual interface
Target specific content types like portfolios or testimonials
CPT Item Rules
Rule Type
Options
Description
When to Use
All CPT Items
Show on all items
Content appears on all items within selected post types
General promotions for a content type
Selected CPT Items
Choose from dropdown list
Manually select specific items from visual interface
Target specific portfolio pieces or testimonials
Two-Level CPT Targeting System
Level 1: Post Types
🎨 Portfolio
⭐ Testimonials
📅 Events
🛒 Products
↓
Level 2: Individual Items
Portfolio Items:
Website Redesign, Mobile App, Logo Design
Testimonials:
John Smith, Sarah Johnson, Mike Wilson
You can target at either level:
Post Type Level: Show on all "Portfolio" items
Item Level: Show only on specific portfolio pieces
Combined: Show on selected "Portfolio" items only
Common Custom Post Type Examples
Post Type
Created By
Typical Use
Targeting Strategy
Portfolio
Themes, Portfolio plugins
Showcasing work, projects, case studies
Promote services on portfolio items
Testimonials
Testimonial plugins, themes
Customer reviews, client feedback
Show contact forms on testimonial pages
Events
Event calendar plugins
Upcoming events, conferences, webinars
Promote registration on event pages
Team Members
Themes, staff plugins
Staff profiles, team bios
Show contact info on team pages
Products
WooCommerce (see separate section)
E-commerce products
Special offers, related products
Automatic Detection: The plugin automatically detects all custom post types registered on your WordPress site. When you install a new plugin or theme that creates custom post types, they will automatically appear in the dropdown lists.
WooCommerce Targeting
Specialized targeting for WooCommerce stores. Control visibility on shop pages, individual products, and product categories to boost sales and improve customer experience.
Prerequisite: Requires WooCommerce plugin to be installed and activated. These settings only appear when WooCommerce is active.
Shop Page Control
Show or hide content on main WooCommerce shop page
Product Targeting
Target individual products or all products
Category Filtering
Target entire product categories
Shop Page Display
Setting
Options
Description
Default
Display on Shop Page
Enable • Disable
Control whether content appears on the main WooCommerce shop page
Enable
Tip: The shop page is typically found at /shop/ on your site. This is different from individual product pages.
Product Page Rules
Rule Type
Options
Description
When to Use
All Product Pages
Show on all products
Content appears on every individual product page
Store-wide promotions, shipping info
Selected Products
Choose from dropdown list
Manually select specific products from visual interface
Featured products, specific promotions
Product Category Rules
Rule Type
Options
Description
When to Use
All Categories
Show on all product categories
Content appears on all WooCommerce product categories
Store-wide category promotions
Selected Categories
Choose from dropdown list
Manually select specific product categories
Seasonal category promotions, specific product lines
WooCommerce Page Structure
Main Shop Page
🏪
/shop/
Main product listing page
↓
Product Categories
👕 Clothing
👟 Shoes
🎒 Accessories
↓
Individual Products
T-Shirt (in Clothing)
Running Shoes (in Shoes)
Backpack (in Accessories)
E-commerce Use Cases
Goal
Shop Page
Product Pages
Categories
Result
Store-wide Sale
Enable
All Products
All Categories
Sale announcement everywhere
Category Promotion
Disable
Selected Products
Selected Categories
Promote specific product lines
Featured Products
Enable
Selected Products
N/A
Highlight specific items on shop page
Shipping Notice
Enable
All Products
All Categories
Shipping info on all store pages
bbPress Targeting
Control visibility on bbPress forum pages. Perfect for community announcements, forum rules, or targeted promotions within your discussion forums.
Prerequisite: Requires bbPress plugin to be installed and activated. These settings only appear when bbPress is active.
Forum-Wide Control
Show content on all forum pages
Selective Targeting
Choose specific forums to display content
Community Focused
Perfect for community announcements and rules
bbPress Visibility Rules
Rule Type
Options
Description
When to Use
All bbPress Pages
Show on all forum pages
Content appears on all bbPress pages (forums, topics, replies)
Community-wide announcements, forum rules
Selected bbPress Pages
Choose from dropdown list
Manually select specific forums from visual interface
Forum-specific announcements, targeted promotions
What are bbPress Pages?
🏛️
Forums
Main discussion categories (e.g., "General Discussion", "Support")
↓
💬
Topics
Individual discussion threads within forums
↓
↩️
Replies
Individual responses within topics
Note: When you target a forum, content appears on that forum's main page AND all topics and replies within that forum.
bbPress Use Cases
Community Type
Targeting Strategy
Content Example
Support Forums
All bbPress Pages
"Need urgent help? Contact our support team"
Product Forums
Selected Forums (Product-specific)
"New update available for this product"
General Discussion
Selected Forums (General only)
"Community guidelines reminder"
Announcements
All bbPress Pages
"Upcoming community event this weekend"
Geographic Targeting
Show or hide content based on visitor location. Target specific countries or individual IP addresses for location-based promotions, regional announcements, or compliance requirements.
Country Targeting
Show content to visitors from specific countries
IP Address Targeting
Target specific IP addresses or ranges
GeoIP Database
Uses built-in GeoIP database for country detection
Location-Based Visibility
Rule Type
Options
Description
When to Use
All Countries
Show to all visitors
Content appears to visitors from any country
Global promotions, universal content
Selected Countries
Choose from dropdown list
Manually select specific countries from visual interface
Regional promotions, country-specific offers
Specific IP Addresses
Enter IP addresses (one per line)
Target specific IP addresses or IP ranges
Internal testing, specific user targeting
How Geographic Detection Works
🌐
Visitor accesses your site
Their IP address is automatically detected
→
🗺️
IP to country lookup
Plugin checks GeoIP database for country
→
✓
Check against your rules
Compares visitor's country with your selected countries
→
👁️
Show or hide content
Displays content only if country matches your rules
Country vs IP Address Targeting
🇺🇸 Country Targeting
Targets by country (e.g., United States)
Uses GeoIP database
Affects all visitors from that country
Easy to manage
Best for: Regional promotions, compliance
🔢 IP Address Targeting
Targets specific IPs (e.g., 192.168.1.1)
Exact IP matching
Affects only specific IPs
More precise control
Best for: Testing, internal use, specific users
IP Address Format:
Enter one IP address per line in the textarea. You can use:
Single IP:192.168.1.1
IP Range:192.168.1.1-192.168.1.50
CIDR Notation:192.168.1.0/24
Multiple IPs: One per line
Geographic Use Cases
Business Need
Targeting Method
Example
Regional Promotion
Selected Countries
Show "Free shipping in US" only to US visitors
Legal Compliance
Selected Countries
Show GDPR notice only to EU visitors
Local Event
Selected Countries
Promote local event only to visitors from that country
Internal Testing
Specific IP Addresses
Show test content only to your office IP
Beta Testing
Specific IP Addresses
Show new feature only to beta testers' IPs
Important Notes:
Geographic targeting uses IP-based location detection, which is generally accurate but not 100% precise
Visitors using VPNs or proxies may appear from different countries
IP addresses can change, especially for mobile users
For critical legal compliance, consider additional verification methods
Scroll & Viewport Targeting
Control content visibility based on user behavior (scrolling) and device characteristics (screen size). Perfect for engagement optimization and responsive design.
Scroll-Based Display
Show content after users scroll a certain distance
Scroll-Based Hiding
Hide content after users scroll beyond a point
Viewport Size Control
Show/hide based on browser window size
Scroll Display Rules
Setting
Options
Description
Default
Scroll Display Rule
Disable • Enable
Show content after visitor scrolls a specified distance
Disable
Scroll Height
Number (pixels)
Distance in pixels from top of page to trigger display
0px
Scroll Hide Rules
Setting
Options
Description
Default
Scroll Hide Rule
Disable • Enable
Hide content after visitor scrolls beyond a specified distance
Disable
Hide Scroll Height
Number (pixels)
Distance in pixels from top of page to trigger hiding
0px
Viewport Width Rules
Setting
Options
Description
Default
Viewport Width Rule
Disable • Enable
Show content only when browser width meets minimum size
Disable
Viewport Width
Number (pixels)
Minimum browser width in pixels to show content
0px
Hide on Viewport Width
Disable • Enable
Hide content when browser width falls below specified size
Disable
Hide Width
Number (pixels)
Browser width in pixels below which content is hidden
0px
Scroll Behavior Demonstration
Scroll position: 0px
Show at 200px
Hide at 600px
🎯 Floating Content
Visible
Viewport vs Scroll: What's the Difference?
🖱️ Scroll-Based
Based on user action (scrolling)
Dynamic - changes as user scrolls
Engagement-based
Example: Show offer after user reads 50% of page
Best for: Engagement, reading progress
📱 Viewport-Based
Based on screen size
Static - based on device/window size
Device-based
Example: Hide on mobile screens below 768px
Best for: Responsive design, device optimization
Scroll & Viewport Use Cases
Goal
Scroll Show
Scroll Hide
Viewport Show
Viewport Hide
Result
Engagement popup
200px
-
-
-
Shows after user scrolls 200px
Sticky header
100px
-
768px
-
Sticky header on desktop after 100px scroll
Mobile-optimized
-
-
-
768px
Hidden on mobile (screens < 768px)
Reading progress
300px
800px
-
-
Shows mid-article, hides near bottom
Impression Control
Limit how often your floating content is shown to prevent overexposure and improve user experience. Control global limits, per-user limits, and repeat display timing.
Global Limits
Set maximum impressions across all visitors
Per-User Limits
Limit how many times each user sees content
Repeat Control
Control when content reappears after being closed
Global Impression Limit
Setting
Options
Description
Default
Global Impression Limit
Disable • Enable
Set a maximum number of times this content can be displayed to all visitors combined
Disable
Maximum Impressions
Number (0 = unlimited)
Total number of times content can be shown across all visitors
0
Per-User Impression Limit
Setting
Options
Description
Default
Per-User Impression Limit
Disable • Enable
Limit how many times each individual visitor can see the content
Disable
Maximum Impressions Per User
Number (0 = unlimited)
Maximum number of times each user can see the content
0
Repeat Display Control
Setting
Options
Description
Default
Repeat Display Control
Enable • Disable
Allow content to reappear after being closed by user
Disable
Redisplay After
Number (days)
Number of days to wait before showing content again to same user
0
How Impression Tracking Works
👤
User visits page
Plugin checks if content should be shown
→
📊
Check impression limits
1. Global limit reached? 2. User limit reached? 3. Recently closed?
→
✓
Show content
If all checks pass, show content and increment counters
→
💾
Store data
Store impression count and user closure timestamp
Global vs Per-User Limits
Global Limit: 1000 impressions
750/1000
Shared across all visitors
When 1000th impression is reached, content stops showing to everyone
Per-User Limit: 3 impressions
User A: ✅✅✅❌ (3/3)
User B: ✅✅⬜⬜ (2/3)
User C: ✅⬜⬜⬜ (1/3)
Individual limits per visitor
Each user sees content max 3 times, regardless of other users
You can use both together: For example, set global limit of 10,000 and per-user limit of 5. This ensures broad reach while preventing individual overexposure.
Impression Control Use Cases
Content Type
Global Limit
Per-User Limit
Repeat Display
Purpose
Limited-time offer
5000
3
7 days
Broad reach without overexposure
Announcement
Unlimited
1
Disable
Everyone sees once, then never again
Seasonal promotion
10000
5
30 days
Seasonal campaign with frequency capping
Important notice
Unlimited
Unlimited
Disable
Always show (no limits)
Technical Notes:
Impression counting uses browser cookies for per-user tracking
Users who clear cookies or use incognito mode may see content again
Global limits are stored in database and persist across sessions
Repeat display timing uses days, not hours/minutes
Impression data is stored for performance optimization
Device & Responsive Settings
Optimize your floating content for different devices and screen sizes. Control responsive behavior, device visibility, and operating system targeting for the best user experience.
Responsive Behavior
Automatically adapt content to screen size
Device Visibility
Show/hide on desktop, tablet, or mobile
OS Targeting
Target specific operating systems
Responsive Behavior
Setting
Options
Description
Default
Responsive Behavior
Enable • Disable
Automatically adjust floating content for different screen sizes
Enable
What "Responsive" Means: When enabled, your floating content will automatically adjust its size, position, and layout based on the visitor's screen size. This ensures optimal viewing experience on mobile phones, tablets, and desktop computers.
Device Visibility
Setting
Options
Description
Default
Device Visibility
• Show on All Devices
• Hide on Desktop Devices
• Hide on Mobile Devices
Control which device types can see the floating content
Show on All Devices
Device Definitions:
Desktop Devices: Screens wider than 1024px (computers, laptops)
Mobile Devices: Screens 768px and narrower (phones, small tablets)
Tablet Devices: Screens between 769px and 1024px (large tablets)
Operating System Targeting
Setting
Options
Description
Default
Operating System Targeting
• Show on All OS
• Hide on Windows
• Hide on macOS
Control visibility based on visitor's operating system
Show on All OS
Device Detection Demonstration
💻
Desktop
> 1024px
Visible
📱
Tablet
769-1024px
Visible
📲
Mobile
≤ 768px
Visible
Windows
Visible
🍎
macOS
Visible
🐧
Other OS
Visible
Device & OS Targeting Use Cases
Scenario
Device Setting
OS Setting
Reason
Mobile-optimized content
Hide on Desktop
Show on All OS
Content designed specifically for mobile touch interfaces
Desktop-only feature
Hide on Mobile
Show on All OS
Complex feature that requires mouse/keyboard
Windows-specific download
Show on All Devices
Hide on macOS
.exe download link only relevant for Windows users
Mac-specific announcement
Show on All Devices
Hide on Windows
Mac software update announcement
Universal announcement
Show on All Devices
Show on All OS
General site-wide announcements
Responsive Design Best Practices:
Always keep Responsive Behavior enabled unless you have specific reasons to disable it
Test your floating content on multiple device sizes before publishing
Consider simplifying complex content for mobile devices
Use Device Visibility to hide non-essential elements on mobile to save screen space
Remember that tablets can switch between portrait and landscape orientations
Combine with Custom CSS for advanced responsive adjustments
Advanced Targeting: Summary
You now have complete control over where, when, and to whom your floating content appears. The 12 targeting systems work together to provide precise control:
Pro Tip: Start with broader targeting and gradually add more specific rules as you learn what works best for your audience. Test different combinations to find the optimal balance between reach and relevance.
Custom CSS Styling
Add your own custom CSS to fine-tune the appearance of your floating content beyond the standard settings.
Desktop CSS
Custom styles that apply to all desktop and tablet devices
Mobile CSS
Device-specific styles that only apply to mobile screens
Advanced Control
Override any style with custom CSS for pixel-perfect design
Custom CSS (Desktop & Tablet)
Add CSS rules that will apply to your floating content on all desktop and tablet devices.
Custom CSS EditorApplies to screens wider than 768px
Live Preview Integration - See changes immediately
Important: Custom CSS applies directly to your floating content. Ensure your CSS is valid and tested across different browsers and devices. Invalid CSS may break the display of your content.
Animation & Motion Effects
Add engaging entrance and exit animations to your floating content with 80+ animation options across 14 categories.
Entrance Animations
How your content appears when it first shows up
Exit Animations
How your content disappears when closed
14 Categories
80+ animation options for every use case
Animation Categories
Category
Animations
Best For
Examples
Attention Seekers
9 animations
Promotions, alerts, important notices
bounce, flash, pulse, shake
Bouncing Entrances
5 animations
Playful content, casual announcements
bounceIn, bounceInDown
Fading Entrances/Exits
18 animations
Professional sites, subtle transitions
fadeIn, fadeOut, slide effects
Zoom Effects
10 animations
Focus drawing, emphasis
zoomIn, zoomOut
Slide Effects
8 animations
Directional movement, sidebars
slideInLeft, slideOutRight
Special Effects
4 animations
Creative sites, unique experiences
hinge, rollIn, jackInTheBox
Entrance Animation
Controls how your floating content appears when it first shows up on the screen.
Fade In (Subtle)
fadeIn
Gentle appearance - good for most sites
Bounce (Playful)
bounceIn
Energetic bounce - great for promotions
Slide In (Directional)
slideInRight
Slides from edge - perfect for sidebars
Zoom (Emphasis)
zoomIn
Zooms into view - draws attention
Recommendation: For most professional websites, use fadeIn, slideInRight, or zoomIn. For playful or promotional content, try bounceIn or pulse.
Exit Animation
Controls how your floating content disappears when users close it or it auto-hides.
Fade Out (Subtle)
fadeOut
Gentle disappearance
Slide Out (Clean)
slideOutRight
Slides off screen
Zoom Out (Smooth)
zoomOut
Zooms out of view
Flip Out (Creative)
flipOutY
3D flip effect
Recommendation: Match your exit animation with your entrance animation. Use fadeOut with fadeIn, slideOutRight with slideInRight, etc.
Popular Animation Combinations
Use Case
Entrance
Exit
Effect
Professional Sites
fadeIn / slideInRight
fadeOut / slideOutRight
Clean, subtle transitions
E-commerce Promotions
bounceIn / zoomIn
bounceOut / zoomOut
Attention-grabbing, playful
Sidebar Notifications
slideInLeft / slideInRight
slideOutLeft / slideOutRight
Directional, space-efficient
Creative/Portfolio Sites
flipInX / rotateIn
flipOutX / rotateOut
Visual interest, 3D effects
Alert/Error Messages
shake / wobble
fadeOut / hinge
Urgent attention needed
How to Use Animations
Select an Entrance Animation from the dropdown (how your content appears)
Select an Exit Animation from the dropdown (how your content disappears)
Save your changes and preview the animations in Live Preview
Test different combinations to find the perfect effect for your content
Animation Class Example:
<!-- Your content will automatically get these classes -->
<div class="afc-floating-content animated bounceIn">
<!-- Your content here -->
</div>
Animation Settings Interface
Key interface elements:
Entrance Animation dropdown - 80+ options in 14 categories
Preview capability - See animations in Live Preview
Animation Tips:
Keep it subtle for professional websites - avoid overly flashy animations
Match animation to content type - playful for promotions, subtle for notifications
Test on mobile - some complex animations may perform differently on mobile devices
Consider performance - simple animations (fade, slide) perform better than complex 3D effects
Use consistently - use the same animation style across similar content types
Display Scheduling & Timing
Control exactly when your floating content appears and disappears with date-based scheduling and timing controls.
Start Date/Time
Set when your content first becomes visible
End Date/Time
Set when your content automatically hides
Delay Control
Add a delay after the start date before showing
Display From (Start Date/Time)
Set the exact date and time when your floating content should first become visible to visitors.
Setting
Input Type
Description
Example
Start Date
Date picker with calendar
The date when content should start displaying
2025-01-15
Time Selection
Time picker (included in date picker)
Exact time on the start date
09:00 AM
▶️
Start Date/Time
Content becomes visible
⏹️
End Date/Time
Content automatically hides
Example: Set start date to "2025-12-01 09:00" for a promotion that should begin at 9 AM on December 1st, 2025.
Display Until (End Date/Time)
Set the exact date and time when your floating content should automatically stop displaying.
Setting
Input Type
Description
Example
End Date
Date picker with calendar
The date when content should stop displaying
2025-01-31
Time Selection
Time picker (included in date picker)
Exact time on the end date
11:59 PM
🎄
Holiday Promotions
Set end date to December 26th for Christmas sales
📢
Limited Time Offers
7-day flash sale ending at specific date/time
📅
Event Announcements
Hide content after event date has passed
Note: If you set only a start date without an end date, content will display indefinitely from the start date onward.
Delay After Start Date
Add a time delay (in seconds) before displaying content, even after the start date/time has been reached.
Setting
Range
Description
Common Uses
Delay in Seconds
0 - 86,400 seconds (0 - 24 hours)
Additional wait time after start date before showing content
5-30 seconds for engagement
5s
Immediate Attention
Short delay for important announcements
15s
Engagement Timing
Allow users to browse before showing content
30s
Soft Introduction
For less intrusive content displays
300s
Extended Engagement
5-minute delay for returning visitors
Best Practice: Use 5-15 second delays for promotional content, 15-30 seconds for informational content, and longer delays (1-5 minutes) for exit-intent or re-engagement content.
How Scheduling Works
1
Set Your Dates
Choose start and end dates/times using the calendar date pickers.
2
Add Optional Delay
Enter seconds (0-86400) to delay display after the start time.
3
Automatic Control
Content automatically shows/hides based on your schedule - no manual intervention needed.
Scheduling Logic
IF Current Date/Time ≥ Start Date/Time AND
IF Current Date/Time ≤ End Date/Time AND
IF Time Since Start ≥ Delay Seconds
THEN Display Content
Scheduling Settings Interface
Key interface elements:
Start Date Picker - Calendar with date/time selection
End Date Picker - Calendar for automatic end date
Delay Input - Seconds delay after start (0-86400)
Calendar Icons - Click to open date picker
Clear Formatting - Easy date entry and clearing
Common Scheduling Scenarios
Scenario
Start Date
End Date
Delay
Result
Weekend Sale
Friday 9:00 AM
Sunday 11:59 PM
0s
Displays all weekend
Product Launch
Launch Day 8:00 AM
1 week later
10s
10-second delay after launch time
Holiday Greeting
Holiday 12:00 AM
Holiday 11:59 PM
5s
Shows only on holiday
Event Countdown
Today
Event Date 9:00 AM
0s
Shows until event starts
Engagement Popup
None (immediate)
None (indefinite)
30s
Shows after 30 seconds on site
Scheduling Tips:
Use timezone-aware scheduling - dates/times use your WordPress timezone setting
Test with Live Preview to verify your scheduling logic
Leave end date blank for ongoing content that should display indefinitely after start
Use delay for better UX - don't interrupt visitors immediately
Combine with countdown timer for urgency (see next section)
Clear both dates to disable scheduling and show content immediately
Important: Scheduling works based on the visitor's browser time, synced with your WordPress timezone. Ensure your WordPress timezone is correctly set in Settings → General.
Countdown Timer & Urgency
Add urgency and time sensitivity to your floating content with automatic display timing and auto-close functionality.
Delayed Display
Show content after a specific time delay on page load
Auto Close
Automatically hide content after a set duration
Urgency Creation
Create time-sensitive offers and limited-time announcements
Countdown Timer Settings Interface
Key interface elements:
Show content after (seconds) - Delay before displaying content
Automatically close after (seconds) - Auto-hide timer after showing
Number inputs - Enter time in seconds (0 = disabled)
Countdown Timer Settings
Setting
Input Type
Description
Default
Show Content After
Number input (seconds)
Time delay after page load before showing the floating content. Set to 0 to show immediately.
0
Auto Close After
Number input (seconds)
Time after content appears before automatically closing it. Set to 0 to never auto-close.
0
How Countdown Timer Works
1
Page Loads
Visitor arrives on your page. The timer starts counting down from your "Show content after" value.
2
Delay Period (Optional)
If you set "Show content after" to 10 seconds, the floating content remains hidden for 10 seconds after page load.
3
Content Appears
After the delay period ends, your floating content appears with its entrance animation.
4
Auto-Close Countdown (Optional)
If you set "Auto close after" to 15 seconds, another timer starts counting down immediately after the content appears.
5
Content Automatically Closes
After the auto-close timer ends, the floating content disappears with its exit animation.
📄
Page Loads
Timer 1 starts
👁️
Content Appears
After Timer 1 ends
❌
Auto-Closes
After Timer 2 ends
Common Use Cases & Examples
Use Case
Show After
Auto Close
User Experience
Welcome Message
3 seconds
10 seconds
Brief welcome that doesn't interrupt initial browsing
Limited Time Offer
5 seconds
30 seconds
Creates urgency for time-sensitive promotions
Exit Intent Alternative
30 seconds
Never (0)
Engages users who've spent time on page
Important Announcement
0 seconds
20 seconds
Immediate attention for critical info
Soft Promotion
15 seconds
15 seconds
Non-intrusive offer with automatic cleanup
Live Demo Simulation
📄 Web Page Content
⏱️ Delay: 5s
→
🎯 Floating Content
→
⏱️ Auto-close: 10s
Total visible time:10 seconds after 5-second delay
Best Practices & Tips:
Use short delays (3-8 seconds) for important announcements to avoid interrupting initial page exploration
Set auto-close for all temporary content to keep your interface clean
Combine with scheduling for time-based campaigns (e.g., flash sales)
Test different timing combinations to find what works best for your audience
Use 0-second delay for critical alerts that need immediate attention
Disable auto-close (set to 0) for persistent elements like newsletter signup bars
Important Notes:
Timers are per-session. If a user refreshes the page, timers reset
If a user manually closes the content, auto-close timer is cancelled
Both timers use seconds as the unit (1 minute = 60, 5 minutes = 300)
Set to 0 to disable either timer function
Works independently of display scheduling - both can be used together
Implementation Example
For a limited-time offer that appears after 5 seconds and disappears after 30 seconds:
Show content after: 5
Automatically close after: 30

// Result:
// 1. Page loads → 5 second delay
// 2. Content appears → 30 second countdown starts
// 3. Content auto-closes → Total: 35 seconds from page load
Sticky Header & Footer Behavior
Create persistent sticky headers or footers that remain visible while users scroll through your content.
Persistent Visibility
Content stays fixed at top or bottom of viewport during scrolling
Top/Bottom Positioning
Choose between header (top) or footer (bottom) sticky placement
Height Control
Set exact height for consistent sticky element sizing
Sticky Position - Top (Header) or Bottom (Footer) selection
Sticky Height - Height input in pixels (0 = auto)
Sticky Behavior Settings
Setting
Input Type
Options
Description
Default
Sticky Mode
Radio buttons
Enable / Disable
Toggle sticky behavior on or off for this floating content
Disable
Sticky Position
Radio buttons
Top / Bottom
Whether content sticks to top (header) or bottom (footer) of viewport
Bottom
Sticky Height
Number input (pixels)
0 - 500px
Fixed height for sticky element. Set to 0 for automatic height based on content.
0 (auto)
Sticky Behavior Demonstration
Sticky Header
📌 Fixed at top
Sticky Footer
📌 Fixed at bottom
How it works: When enabled, the element remains fixed at the selected position (top or bottom) while users scroll through page content.
How Sticky Behavior Works
1
Enable Sticky Mode
Set "Sticky Mode" to "Enable" to activate persistent positioning for your floating content.
2
Choose Position
Select "Top (Header)" to stick to top of screen, or "Bottom (Footer)" to stick to bottom of screen.
3
Set Height (Optional)
Enter a height in pixels (e.g., 60) for consistent sizing, or leave as 0 for automatic height based on content.
4
Test & Publish
Use Live Preview to test sticky behavior, then publish. Content will remain visible during scrolling.
Sticky Header
📌 Header stays here
⬇️ Content scrolls under
Best for: Navigation menus, announcement bars, persistent calls-to-action
Sticky Footer
⬆️ Content scrolls above
📌 Footer stays here
Best for: Cookie notices, chat widgets, secondary actions
Common Use Cases & Configuration Examples
Use Case
Sticky Mode
Position
Height
Purpose
Announcement Bar
Enable
Top
50px
Persistent site-wide announcements or promotions
Cookie Notice
Enable
Bottom
80px
GDPR compliance notice that stays visible
Navigation Menu
Enable
Top
70px
Always-accessible site navigation
Chat Widget
Enable
Bottom
60px
Persistent customer support access
Promotional Banner
Enable
Top
40px
Limited-time offer that stays in view
Regular Content
Disable
N/A
0 (auto)
Normal floating content that scrolls with page
Understanding Sticky Height
Auto Height (0)
Content determines height
Expands to fit all content
When to use: When content size varies or you want flexible height
Fixed Height (e.g., 60px)
Fixed height container
Content may scroll if too tall
When to use: For consistent UI elements and predictable layout
Height Recommendations:
Announcement bars: 40-60px
Navigation headers: 60-80px
Cookie notices: 70-100px
Chat widgets: 50-70px
Promotional banners: 50-80px
Technical Considerations:
Sticky elements use CSS position: fixed for persistent positioning
When using sticky headers, consider adding padding-top to your body to prevent content from being hidden behind the header
For mobile devices, test sticky behavior as viewport height changes with browser UI
Sticky elements are independent of page layout and exist outside normal document flow
Use with caution on mobile - excessive sticky elements can reduce usable screen space
Important Notes:
Only one sticky element per page is recommended for optimal user experience
Sticky elements may overlap with existing site headers/footers - test thoroughly
On mobile, ensure sticky height doesn't exceed 30% of screen height
Consider disabling sticky behavior on mobile for complex layouts
Sticky mode works independently of other positioning settings
Configuration Example: Announcement Bar
Settings for a promotional announcement bar:
Sticky Mode:Enable
Sticky Position:Top (Header)
Sticky Height:50px
Result: A 50px tall promotional bar that stays fixed at the top of the screen during scrolling.
User Role & Access Targeting
Control exactly which users can see your floating content based on their WordPress user roles and permissions. The plugin automatically detects all user roles on your site.
Dynamic Role Detection
Automatically loads all user roles from your WordPress installation
Plugin Compatibility
Includes custom roles from WooCommerce, membership plugins, and more
Guest Visitor Control
Specifically target logged-out visitors with the "No User Roles" option
Dynamic Role Detection System
Important: The plugin doesn't have a fixed list of user roles. Instead, it automatically scans your WordPress installation and displays all available user roles, including:
WordPress Core Roles
Admin
Full site administration
Editor
Content management
Author
Publish own content
Contributor
Write but not publish
Subscriber
Basic membership
Plugin-Generated Roles
Customer
WooCommerce customers
Shop Manager
WooCommerce managers
Member
Membership plugins
Student
LMS plugins
...
Any custom role on your site
Special Option
No User Roles
Logged-out visitors (guests)
How it works: When you access the User Role settings, the plugin queries WordPress for all registered user roles and displays them in the dropdown. This means you'll see exactly the roles that exist on your specific WordPress installation.
Dynamic User Role Settings Interface
Key interface elements:
Dynamic dropdown - Automatically populated with your site's roles
"No User Roles" option - Always available for guest targeting
Multiple selection - Hold Ctrl/Cmd to select multiple roles
Plugin roles included - WooCommerce, membership, LMS roles appear automatically
User Role Targeting Settings
Setting
Input Type
What You'll See
Description
Default
Allowed User Roles
Dynamic multiple-select dropdown
Always includes:
• "No User Roles" (logged-out visitors)
• WordPress core roles (Admin, Editor, etc.)
May also include:
• WooCommerce roles (Customer, Shop Manager)
• Membership plugin roles
• LMS plugin roles (Student, Teacher)
• Any custom roles from other plugins
• Your custom-created roles
Select which user roles can see this floating content. The list is dynamically generated from your WordPress installation.
Empty (shows to all users)
What You'll Typically See (Based on Your Plugins)
Basic WordPress Site
No User RolesAdministratorEditorAuthorContributorSubscriber
+ WooCommerce
CustomerShop Manager
+ Membership Plugin
MemberPremium MemberGold Member
+ LMS Plugin
StudentTeacherInstructor
The list grows with your site: As you install new plugins that create user roles, those roles automatically appear in the dropdown. You don't need to update the plugin or change any settings.
How Dynamic Role Detection Works
1
Plugin Queries WordPress
When you open the settings, the plugin asks WordPress: "What user roles exist on this site?"
2
WordPress Provides List
WordPress returns a complete list of all registered user roles, including those created by other plugins.
3
Plugin Builds Dropdown
The plugin dynamically creates a dropdown menu with all the retrieved roles plus the special "No User Roles" option.
4
You Make Your Selection
You select which roles should see the content from the dynamically generated list.
5
Real-Time Checking
When a user visits, the plugin checks their role against your selection and shows/hides content accordingly.
Understanding "No User Roles"
👤
Logged-in Users
Have at least one user role
→
Sees content if role is selected
👥
Logged-out Visitors
No user roles assigned
→
Only sees content if "No User Roles" is selected
"No User Roles" is a special option that targets visitors who are NOT logged in. These visitors don't have any WordPress user role, so this option was created specifically to target them.
When to use "No User Roles":
Show sign-up incentives to new visitors
Display introductory offers to first-time users
Show cookie consent notices to all guests
Promote newsletter subscriptions to non-members
Hide member-only content from visitors
Practical Use Cases & Examples
Business Need
Target Audience
Roles to Select
Result
E-commerce: VIP Customer Offers
Registered customers only
Customer (from WooCommerce)
Special offers visible only to people who created accounts
Membership Site: Tiered Content
Premium members only
Premium Member, Gold Member
Exclusive content for paid membership levels
Online Course: Student Resources
Enrolled students only
Student (from LMS plugin)
Course materials visible only to enrolled students
Business: Internal Communications
Staff and management
Administrator, Editor, Author
Internal announcements hidden from customers/visitors
Marketing: Visitor Conversion
New visitors only
No User Roles
Welcome offers shown only to non-logged-in visitors
General: Site-wide Announcement
Everyone
Leave all unselected
Content visible to all users regardless of role
Working with Custom & Plugin-Generated Roles:
Roles appear automatically - When a plugin creates new user roles, they automatically appear in the dropdown
Role names vary - Different plugins may use different names for similar roles (e.g., "Member", "Subscriber", "Customer")
Test with actual users - Create test accounts with different roles to verify targeting works correctly
Combine with other rules - Use role targeting together with page targeting, scheduling, etc., for precise control
Empty selection = everyone - If you want content visible to all users, don't select any roles
Troubleshooting & Common Questions:
Role not appearing? Ensure the plugin creating the role is active and the role has been properly registered in WordPress
"No User Roles" not working? Test in incognito mode to ensure you're actually logged out
Caching issues? Some caching plugins may cache role-based content - test with caching disabled
Multiple roles per user? If a user has multiple roles, they'll see content if ANY of their roles is selected
Custom role disappeared? If you deactivate a plugin, its roles may disappear from the list
Quick Reference: Common Role Scenarios
👑
Show to administrators only
Select: Administrator
🛒
Show to customers only
Select: Customer (if using WooCommerce)
👥
Show to visitors only
Select: No User Roles
📚
Show to students only
Select: Student (if using LMS plugin)
🌍
Show to everyone
Select: Nothing (leave all unselected)
Dynamic Latest Posts Display
Automatically display your most recent blog posts or specific selected posts within your floating content to drive engagement and increase readership.
Dynamic Content
Automatically updates with your latest posts - no manual editing needed
Flexible Display
Show before or after your main content with customizable count
Custom Selection
Choose specific posts by ID or let WordPress pick the latest ones
Styling Control
Customize link colors, font sizes, and hover effects
Latest Posts Settings Interface
Key interface elements:
Enable/Disable toggle - Turn latest posts feature on or off
Placement options - Show before or after main content
Posts count - Number of posts to display
Custom post selection - Choose specific posts by ID
Link styling - Font size and color customization
Latest Posts Display Settings
Setting
Input Type
Options
Description
Default
Display Latest Posts
Radio buttons
Enable • Disable
Turn the latest posts feature on or off for this floating content
Disable
Posts Placement
Radio buttons
Before Content • After Content
Where the posts list appears relative to your main floating content
Before Content
Posts to Display
Number input
1 - Any number
Number of latest posts to show (ignored when custom posts are enabled)
1
Use Custom Post Selection
Radio buttons with conditional field
Enable • Disable
Switch between automatic latest posts and manually selected posts
Disable
Specific Post IDs
Text input (appears when custom selection is enabled)
Comma-separated IDs (e.g., "123, 456, 789")
Manually select which posts to display by their WordPress post IDs
Empty
Link Font Size
Number input (pixels)
8 - 72px
Font size for post title links
15px
Link Color
Color picker
Any hex color
Color of post title links
#000000 (black)
Link Hover Color
Color picker
Any hex color
Color when users hover over post title links
#000000 (black)
How Latest Posts Display Works
Posts Placement: Before Content
📰
Latest Blog Post Title
📰
Previous Blog Post Title
🎯 Your Floating Content
This is your main floating content message, call-to-action, or promotion.
↑ Posts appear FIRST
Posts Placement: After Content
🎯 Your Floating Content
This is your main floating content message, call-to-action, or promotion.
📰
Latest Blog Post Title
📰
Previous Blog Post Title
↑ Posts appear LAST
#2563EB
Dynamic updates: When you publish new blog posts, they automatically appear in the floating content (unless you're using custom post selection).
Two Display Modes: Automatic vs Custom
Automatic Mode
Displays your most recent posts automatically. Perfect for blogs that publish regularly.
How it works:
WordPress automatically selects your latest published posts
Number of posts controlled by "Posts to Display" setting
Updates automatically when you publish new content
Always shows freshest content
Best for: News sites, active blogs, content-heavy websites
Custom Selection Mode
Manually select specific posts to display. Perfect for promoting curated content.
How it works:
Enter specific post IDs separated by commas
Posts display in the order you specify
"Posts to Display" setting is ignored
Only shows your chosen posts
Best for: Promoting key articles, evergreen content, product features
Switching Between Modes:
⚙️
Set "Use Custom Post Selection" to Disable
→
🔄
Posts automatically update with latest content
→
📊
Control number with "Posts to Display"
⚙️
Set "Use Custom Post Selection" to Enable
→
🎯
Enter specific post IDs in "Specific Post IDs" field
→
📋
Only your chosen posts display (order preserved)
How to Find Post IDs for Custom Selection
📝
Method 1: WordPress Admin List
Go to Posts → All Posts in your WordPress dashboard
Hover over any post title
Look at the bottom-left of your browser (status bar) or check the URL
The ID appears in the link: post.php?post=123&action=edit
123, 456, 789← Three posts, comma-separated 42← Single post ID 101, 102, 103, 104, 105← Multiple posts in sequence 15, 37, 89← Non-sequential post IDs
Tip: Posts will display in the exact order you enter them. Put your most important posts first!
Link Styling & Customization
Post Link Styling Preview
Example Blog Post Title
Example Blog Post Title (Hover State)
Design Tips:
Use contrasting colors for links to make them stand out
Set hover color darker or brighter than normal link color for visual feedback
15-18px font size works well for most floating content
Test colors on both light and dark backgrounds if your content changes
Consider your website's brand colors for consistency
Practical Use Cases & Examples
Goal
Recommended Settings
Result
Increase Blog Traffic
Enable, 5 posts, Before Content
Latest posts appear first, driving readers to your blog
Promote Key Articles
Enable, Custom Selection, specific IDs
Only your most important posts are featured
Related Content Suggestions
Enable, 3 posts, After Content
Readers see related posts after your main message
Evergreen Content Promotion
Enable, Custom Selection, evergreen post IDs
Always shows your best-performing timeless content
Seasonal Content
Enable, Custom Selection, seasonal post IDs
Show holiday or seasonal posts at appropriate times
Product Updates
Enable, 2 posts, Before Content
Latest product announcements appear prominently
Advanced Tips & Best Practices:
Combine with scheduling to show different posts at different times of day or days of week
Use custom CSS to add icons, borders, or backgrounds to your post links
Test different placements - "Before Content" often works better for engagement, "After Content" for discovery
Update custom selections regularly to keep featured content fresh
Monitor click-through rates to see which posts perform best in floating content
Consider post length - very long post titles may not display well in limited space
Important Technical Notes:
Custom selection overrides automatic mode - when you enable custom posts, the "Posts to Display" setting is ignored
Posts must be published - drafts, scheduled, or private posts won't display
Post order in custom selection is preserved exactly as you enter the IDs
Non-existent post IDs are simply skipped (no error displayed)
Link styling applies to all posts - you can't style individual posts differently
Caching considerations - some caching plugins may cache the post list; clear cache after changing settings
Complete Configuration Example
Scenario: A cooking blog wants to feature their 3 latest recipes before a newsletter signup form.
Display Latest Posts:Enable
Posts Placement:Before Content
Posts to Display:3
Use Custom Post Selection:Disable
Link Font Size:16px
Link Color:#DC2626 (red)
Link Hover Color:#B91C1C (darker red)
Result: Visitors see the 3 most recent recipe posts (automatically updated) in red text, followed by the newsletter signup form. When they publish a new recipe, it automatically appears in the list.
WooCommerce Product Display
Showcase your products directly within floating content to boost sales, promote offers, and increase customer engagement. Perfect for e-commerce stores using WooCommerce.
WooCommerce Integration
Seamlessly connects with your WooCommerce store
Smart Product Selection
Latest, featured, on-sale, or custom product selection
Flexible Layouts
Stacked or inline display with customizable elements
Advanced Controls
Control which product elements appear (image, title, price, button)
Prerequisite: This feature requires WooCommerce plugin to be installed and activated on your WordPress site. If WooCommerce is not active, these settings will not appear.
WooCommerce Product Display Settings
Key interface elements:
Enable/Disable toggle - Turn product display on or off
Product Type dropdown - Latest, Featured, On-Sale, etc.
Custom Product IDs field - Manually select specific products
Product count - Number of products to display (1-20)
Display elements checkboxes - Image, Title, Price, Button
Layout style - Stacked or inline display
WooCommerce Product Display Settings
Setting
Input Type
Options
Description
Default
Enable Product Display
Radio buttons
Enable • Disable
Turn WooCommerce product display on or off for this floating content
Disable
Product Type
Dropdown select
• Latest Products
• Featured Products
• On-Sale Products
• Best-Selling Products
• Specific Product IDs
Which products to display based on WooCommerce criteria
Latest Products
Custom Product IDs (appears when "Specific Product IDs" is selected)
Result: A floating bar shows 4 currently discounted products side-by-side with images, titles, prices, and "Add to Cart" buttons. When products go on/off sale, the display updates automatically.
Troubleshooting & Support
Get help with common issues, contact support, and share your experience.
Documentation
Complete guide for all features and troubleshooting.
Quick answers to the most common questions about Advanced Floating Content.
Licensing & Purchase
Can I use the plugin on multiple websites?
Each purchase is valid for a single website. For multiple websites, you need to purchase additional licenses. This is a standard requirement for CodeCanyon plugins to ensure fair usage and continued development.
Note: You can use the plugin on a development/staging site for the same website without needing an additional license.
What happens if I don't validate my license?
Without license validation:
Premium features remain locked
You won't receive plugin updates
No access to premium support
Limited functionality
Always validate your license immediately after installation to unlock all features.
Can I get a refund if the plugin doesn't work?
Refunds are handled through CodeCanyon's refund policy. Before requesting a refund:
Contact our support team for assistance
Check the documentation and FAQ
Ensure your server meets minimum requirements
Test for plugin conflicts
Most issues can be resolved with proper configuration or server adjustments.
Technical & Compatibility
Does the plugin work with page builders?
Yes! Advanced Floating Content is compatible with all major page builders including:
Elementor
Divi Builder
WPBakery
Beaver Builder
Gutenberg
Classic Editor
The floating content appears independently of your page builder content.
Why isn't my floating content appearing?
If your content isn't appearing, check these common issues:
Display Rules: Check if targeting rules exclude the current page/user
Scheduling: Verify start/end dates and times
Cache: Clear your WordPress and browser cache
JavaScript: Ensure JavaScript isn't blocked in browser
Plugin Conflict: Test with other plugins disabled
Status: Confirm the content is published (not draft)
Use the Live Preview feature to test content appearance.
Will the plugin slow down my website?
Advanced Floating Content is optimized for performance:
Lightweight: Minimal JavaScript and CSS footprint
Cached: Content is cached for better performance
Lazy Loading: JavaScript loads only when needed
Optimized Queries: Efficient database queries
Performance Tip: For best performance, limit the number of active floating content items and use appropriate targeting rules.
Troubleshooting
How do I fix JavaScript conflicts?
For JavaScript conflicts:
Disable other plugins one by one to identify the conflict
Switch to default WordPress theme to rule out theme issues
Check browser console for JavaScript errors (F12 → Console)
Update all plugins and WordPress to latest versions
Use jQuery compatibility mode in plugin settings if available
Contact support with the conflict details for specific solutions.
Why are animations not working?
Animation issues can be caused by:
CSS Conflicts: Other CSS may override animation styles
Browser Compatibility: Some older browsers don't support CSS3 animations
Performance Settings: Some devices/browsers reduce animations for performance
Plugin Settings: Check if animations are enabled in content settings
Cache: Clear cache after changing animation settings
How do I reset the plugin settings?
To reset plugin settings:
Warning: This will remove all your floating content and settings!
Go to Advanced Floating Content → Settings
Scroll to the bottom to find "Reset Plugin" section
Click "Reset All Data" button
Confirm the reset in the popup dialog
The plugin will be restored to default settings
Consider exporting your content before resetting.
Contact Support
Get direct assistance from our support team for issues not covered in the documentation.
Before Contacting Support
To help us resolve your issue faster, please check these steps first:
1
Check Documentation
Search this documentation for your issue - many common problems are already covered.
2
Test Basic Troubleshooting
Clear WordPress and browser cache
Disable other plugins temporarily
Switch to default WordPress theme
Update WordPress and all plugins
3
Gather Information
Prepare this information before contacting support:
WordPress version
PHP version
List of active plugins
Theme name and version
Error messages/screenshots
Important: Support is provided only to customers with valid licenses. Ensure your license is validated before contacting support.
Rating & Review Guide
Share your experience and help other WordPress users make informed decisions.
Benefits of Leaving Reviews
Help Other Users
Your experience helps future buyers decide if this plugin is right for their needs.
Improve the Plugin
Constructive feedback helps us identify areas for improvement and new features.
Support Development
Good reviews encourage continued development, updates, and support.
Build Community
Share tips and workarounds that can help other users succeed.
Step-by-Step Rating Process
Rating Progress
0/6
1
Log into CodeCanyon
Go to CodeCanyon.net and log into your account using your purchase credentials.
Note: Use the same email address you used for the purchase.
2
Access Your Downloads
Click on your profile picture in the top-right corner, select "Downloads" from the dropdown menu, then find "Advanced Floating Content" in your list.
Alternative: You can also access the plugin directly through your purchase email receipt.
3
Rate the Item
On the plugin page, look for the "Leave a Rating" button (usually near the purchase button or in the sidebar).
CodeCanyon Item Page
Leave a Rating
Click this button to start the rating process
4
Select Your Rating
Choose between 1-5 stars based on your overall experience with the plugin.
Excellent - Exceeded expectations
Good - Met expectations
Average - Room for improvement
5
Write Your Review
Add detailed comments about your experience. Be specific about what you liked, what could be improved, and how you're using the plugin.
Pro Tip: Reviews with specific examples and constructive feedback are most helpful to other users.
6
Submit & Share
Click "Submit Review" to publish your rating. Consider sharing your experience on social media to help other WordPress users.
"I needed a way to display time-sensitive promotions across my e-commerce site. This plugin made it incredibly easy to create sticky announcement bars that appear only on product pages. The targeting options saved me hours of manual work. Support helped me with a minor CSS issue within 24 hours. Highly recommended for any WooCommerce store!"
Helpful to 42 other users
Good with Room for Improvement
"The plugin works well for basic floating content needs. I use it for newsletter signup forms that appear after scrolling. The interface is clean and mostly intuitive. I deducted one star because the mobile preview could be better, and I'd love to see more animation options. Overall, solid plugin that does what it promises."
Helpful to 18 other users
How Reviews Help Everyone
For Buyers
Make informed purchasing decisions
Learn about real-world usage
Discover tips and best practices
Understand limitations before buying
For Developers
Identify bugs and issues quickly
Understand user needs and pain points
Prioritize feature development
Improve documentation based on feedback
For the Community
Build a knowledge base of solutions
Encourage quality plugin development
Create transparency in the marketplace
Help WordPress ecosystem grow
Ready to Share Your Experience?
Your review helps shape the future of Advanced Floating Content and assists other WordPress users.